Hi! I will tell you how you can easily and quickly build an infrastructure for a Symfony2-app, which can be automatically scaled in relation to the load. To run a Symfony2-project on the AWS platform you need to go through several stages.
First of all you need to choose the global region where this app will “live”. Ideally, it should be located as close as possible to the bulk of the target audience. You’ll need to indicate this region wherever possible. In our example we will use us-west-1 (N. California).
In OpsWorks we create a new Stack.

While filling in the form we need to create an “IAM role” and a “Default IAM instance profile”.
The “Default SSH key” is the SSH key which we will add when creating a new instance.
Keep it in a safe place, because in the future it will not be available for download.
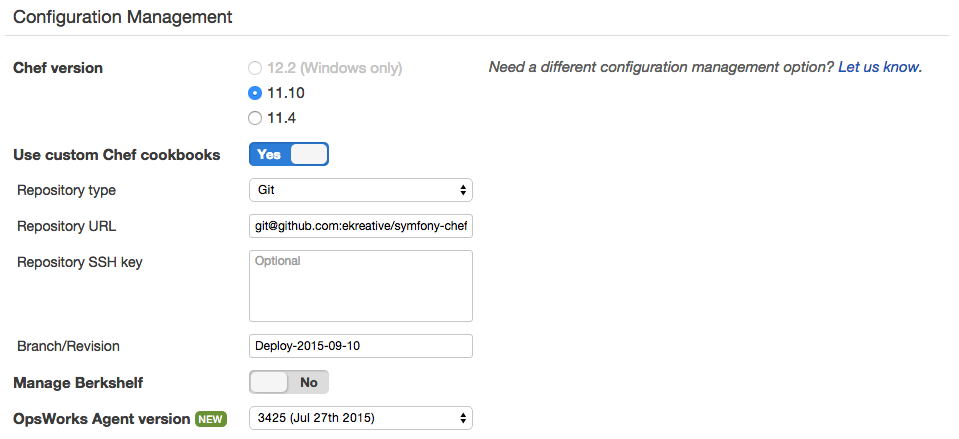
In the “Advanced” section you need to choose “Use custom Chef cookbooks – Yes”. A Chef cookbook is a set of a scripts for server and app settings and installation. You need to give permission to the repository of recipes. You can see a working version of the recipes here.
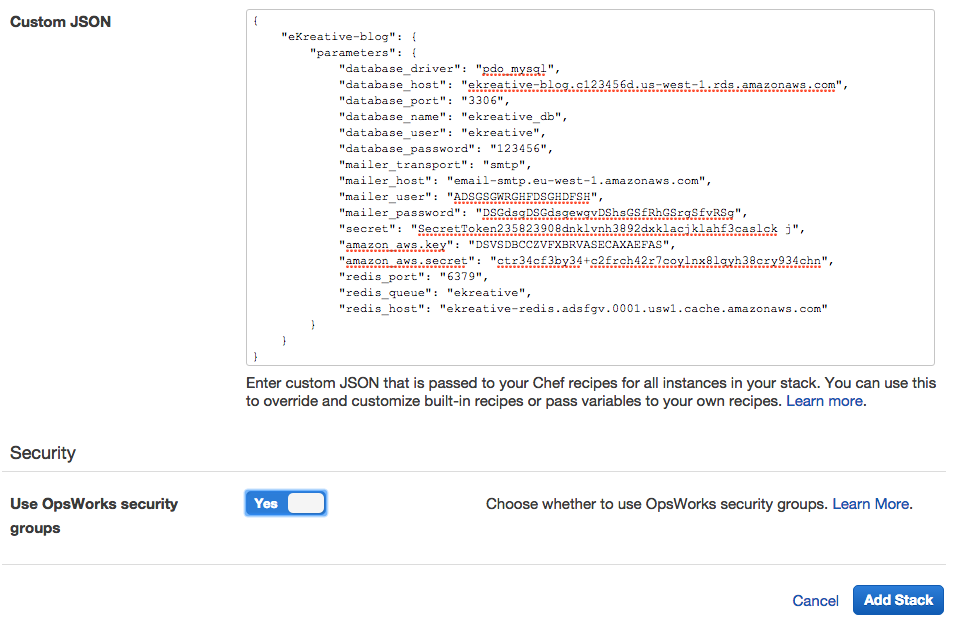
We’ll talk about the execution of recipes later on. In the “Custom JSON” section we set the configuration for recipes (for each Layer). For example, the recipe “symfony::parameters” generates the file app/config/parameters.yml based on this configuration. It means that all parametres of external services (mysql, smtp, redis) are indicated there.
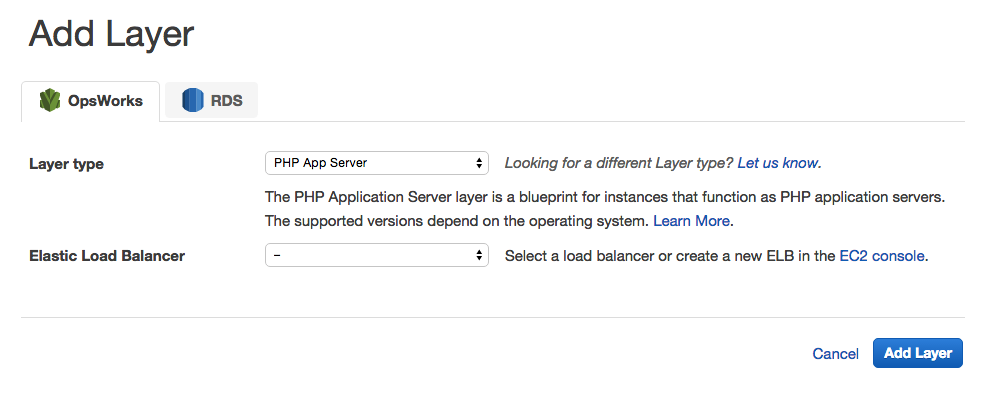
After successfully creating the Stack we add a Layer.
Layer type: PHP App Server
Now to create the App. In “Document root” we enter “web”.
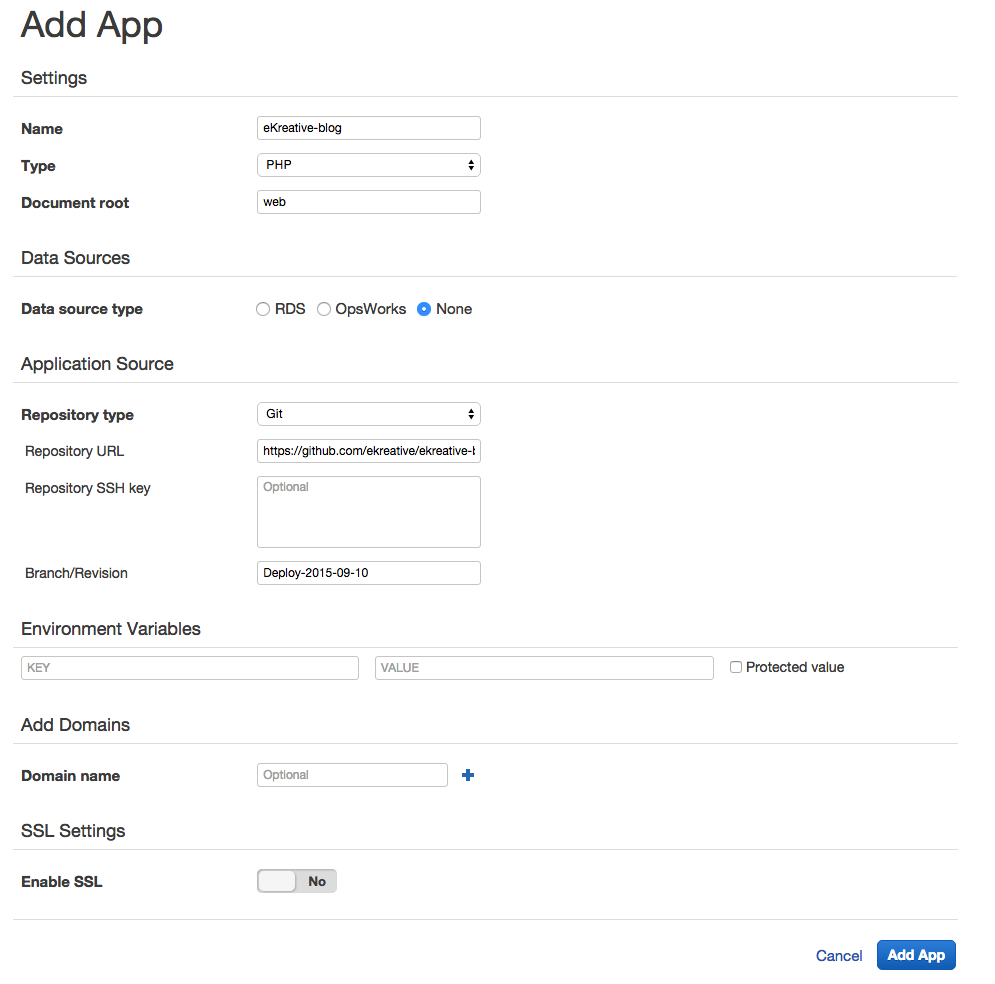
The most important section of this form is “Application Source”. Here you add the source origin. In the example I’ve used a git-repository. As well as the repository url and SSH key settings, I also recommend recording a tag-commit in the “Branch / Revision” field. It becomes critical when the system begins to create new instances, if nothing is entered in this field, it will use the last commit from the master branch, at the same time existing instances will use an older version.
This also works for recipe repositories.
Now, when the system knows the sources origin, you must specify a scenario for creating the system. For this we need to go to “Layer”, to the “Recipes” chapter and then it’s as simple as adding the right recipe to the right section.
A typical configuration might look like this:
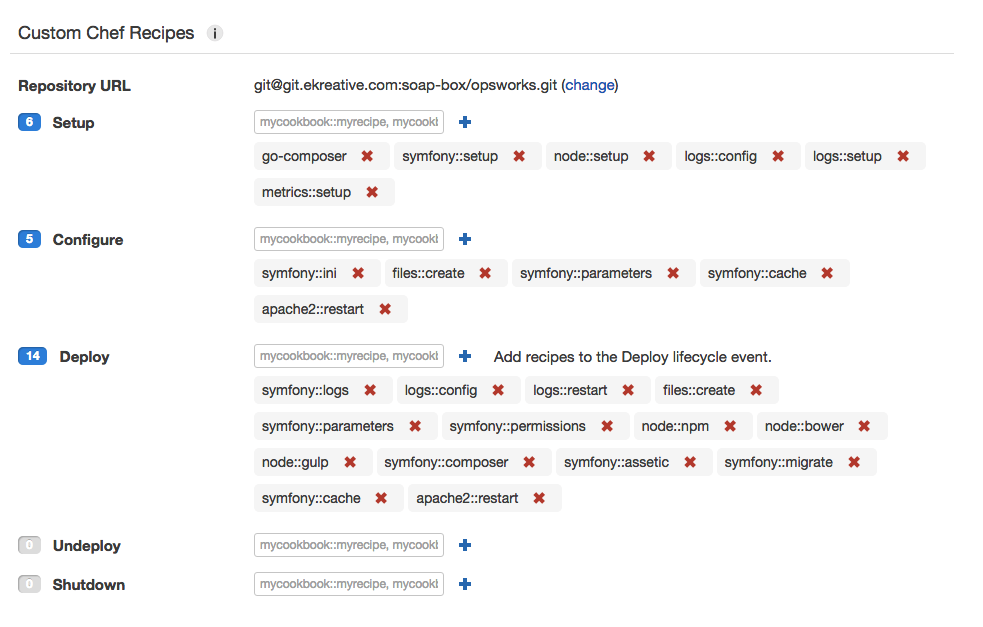
Here apache2 is installed, PHP can be configured, file rights are changed, Composer is installed, repository logs are customizable (logs will be available via the Cloud Watch service), npm, bower and gulp are installed and the cache is cleared.
Basically, all the commands that would usually take us so much time to do by hand are taken care of.
We need to create a database separately in RDS. Here we can create it as a separate instance and separate replication.
If you would like to use more than one instance, be sure to configure external storage for the sessions. You can do this using Redis or Memcached. You can create such storage in ElastiCache.
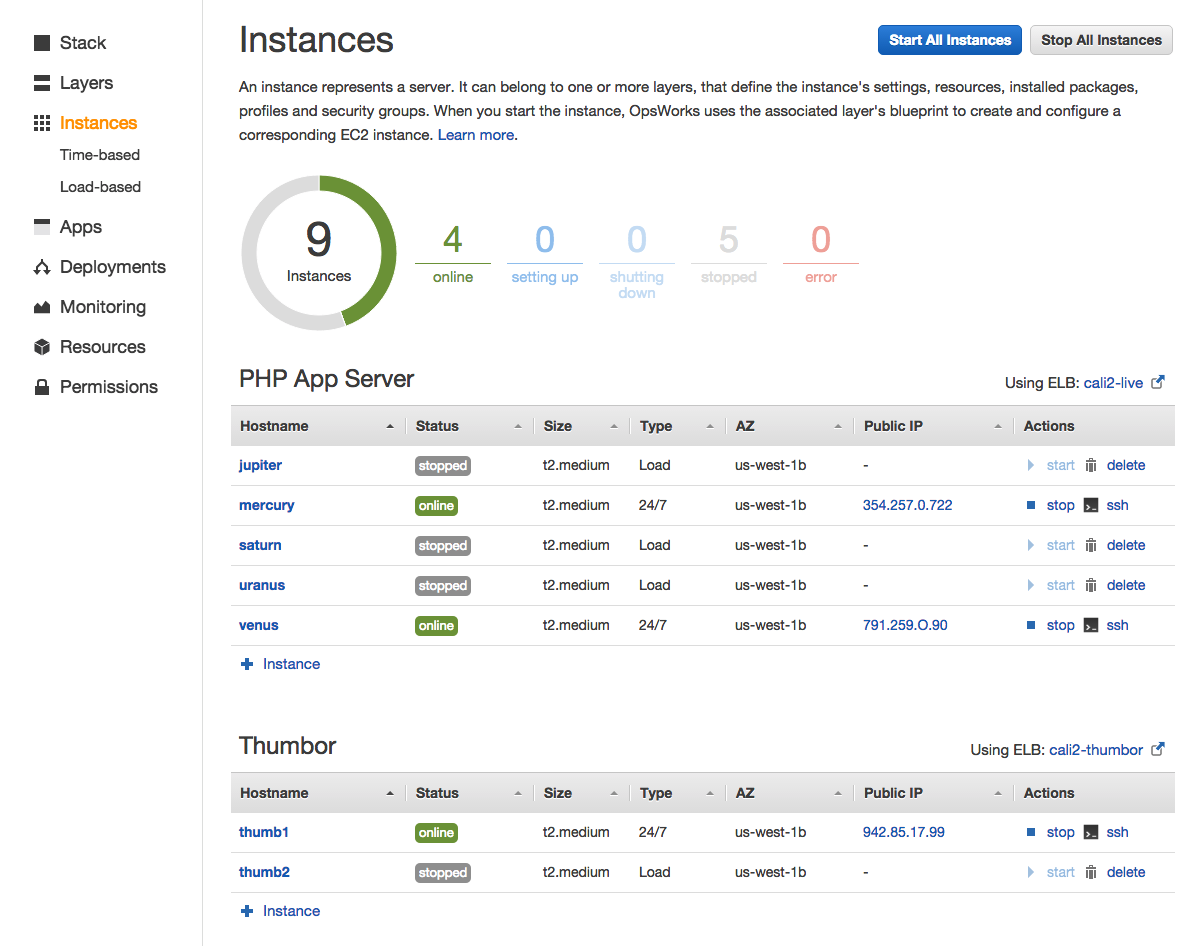
After everything is configured and run, you need to add the necessary amount of instances in the “Instances” section. Depending on your needs, you can add different types:
24/7 – which works continuously and can be run and stopped manually.
Load-based – which runs if the average system load exceeds a specified value. If the system load drops below the stop value – it stops.
Time-based – which works for a clearly defined time interval.
When we add the instance, these recipes are performed and after launch our server is ready to work.
To distribute the load among the instances we need to add elastic-load-balancer to each Layer.
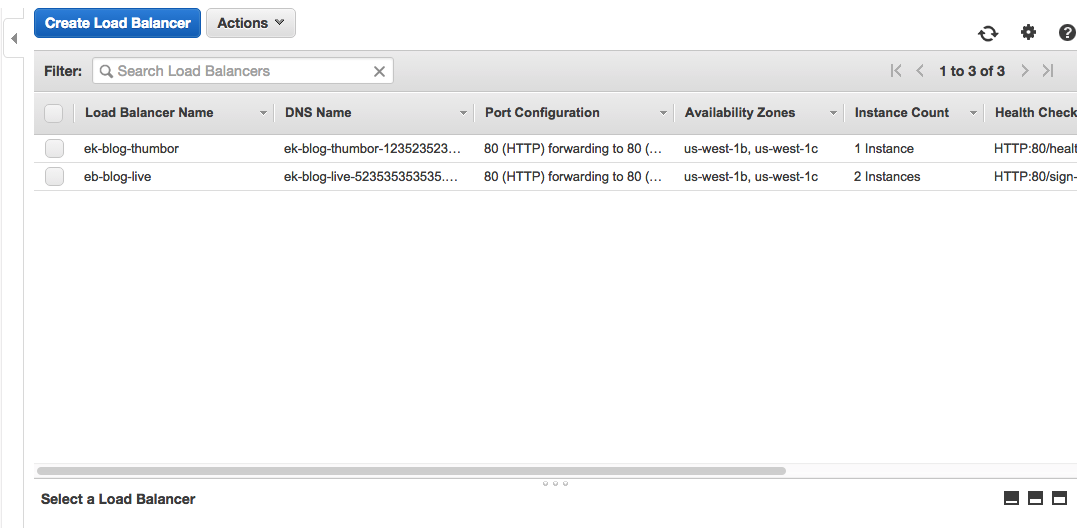
The domain must reference the DNS Name of the created Load Balancer.
After making changes to the system code, we need to make changes to the repository and assign these changes a tag. Then we need to change the old tag to the new one in the App section. After that start the deployment in the “Deployments” section.
If your horoscope predictions are good for today and you have done everything correctly, everything should fall into place without problems and within minutes you will have a working draft AWS platform.


Related Posts
Agentic Teams vs Sub-Agents: The AI Architecture Decision Most Teams Get Wrong
Why the difference between “more agents” and “better thinking” quietly determines whether your AI investment compounds, or stalls out The…

IoT and Wearables in Healthcare: Transforming Patient Care with Mobile Apps
In today’s fast-paced world, the healthcare industry is constantly evolving, driven by technological advancements that have the potential to transform…

Why your web or mobile app needs a regular security audit
Despite the obvious risks to a technology based business posed by hackers, phishers and other bad actors, sometimes a project’s…