When you’ve got Google Data Studio all set up for your project, it’s just magic. The insights it can provide quickly become a core resource for making sensible business decisions. The only problem with getting everything set up is the number of unsupported integrations, especially when it comes to email service providers.
Recently when setting up Google Data Studio for one project we encountered this exact problem, a lack of integration for the email service provider Active Campaign.
Making an Active Campaign integration for Data Studio
To resolve this problem we developed a solution where the data from Active Campaign is automatically exported into a Google sheets document that can be easily integrated with Google Data Studio.
You can find an example of what the operational Active Campaign report could look like here.
It sources its information an automatically updated spreadsheet that you can check out here.
Below, I’ll outline the steps for setting this up specifically with Active Campaign, but the same process could be used to create integrations with other, similar services.
Step by step Active Campaign integration tutorial
1. Create a new Google Sheet and add three tabs with the following names: ‘General Info’, ‘Campaigns’, ‘Automations’. You can change these names in the script later if needed.
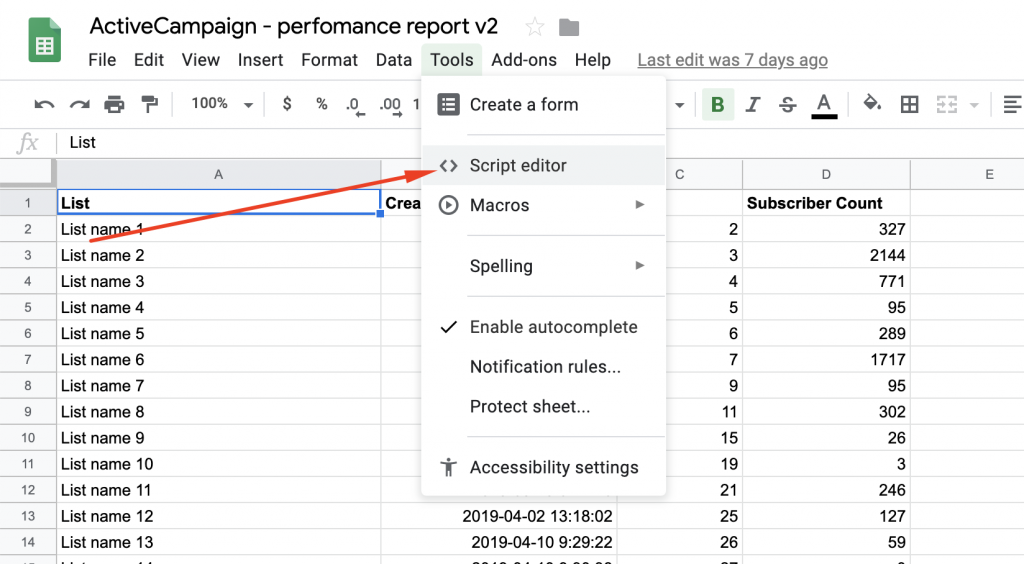
2. Open Dashboard -> Tools -> Script editor
3. Create four Script files. Go to File → New → Script file and name them according to the tabs in the doc you created in step 1. The 4th file can be named ‘Main_function’ – we will use this file to enter credentials to ActiveCampaign API v3 and API v1.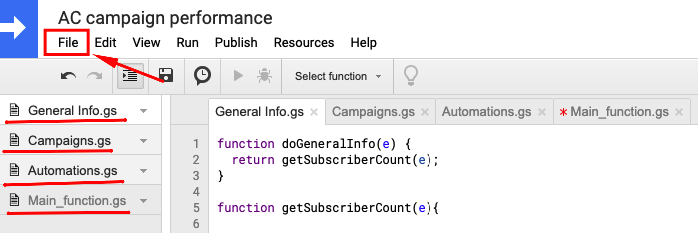
4. Copy the following code to each file:
5. In Active Campaign go to Settings -> Developer and find your URL and API key 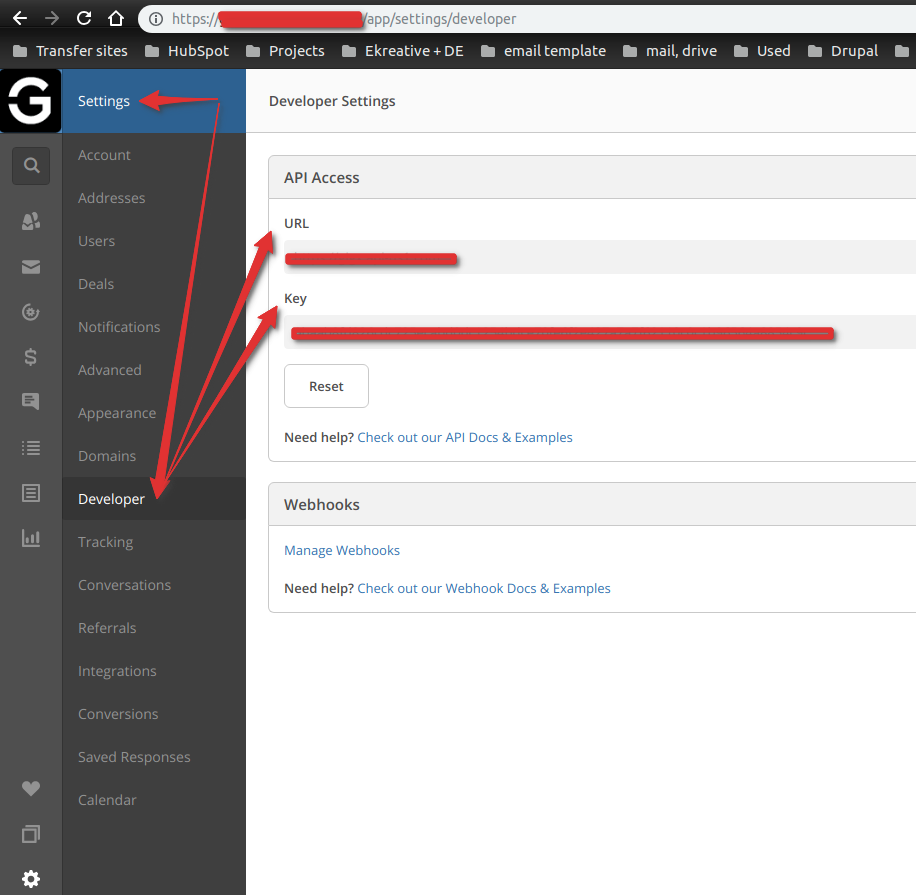
6. Update default values in the following lines of code in the Google Sheet script editor: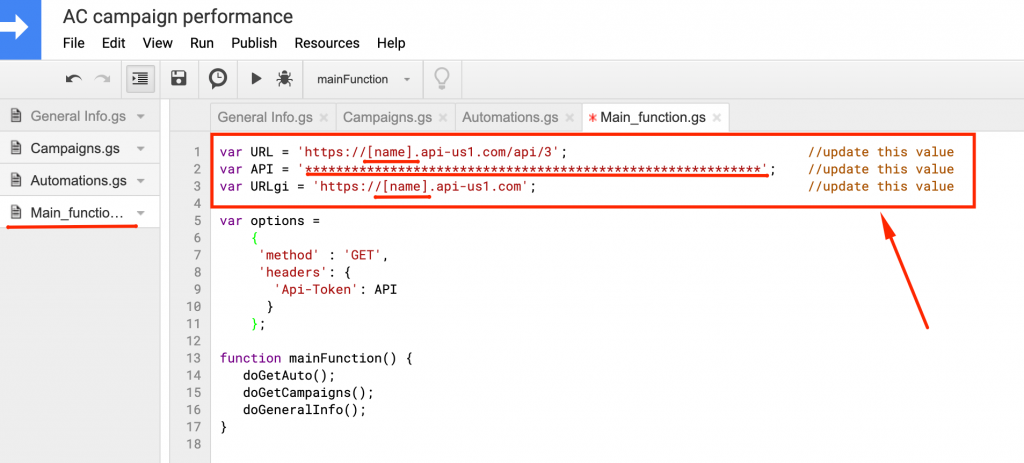 *Unfortunately new API (version 3) doesn’t give an option to pull the number of all contacts in CRM that is why we are using API v1 to pull that info.
7. Click the “Save” and “Run” buttons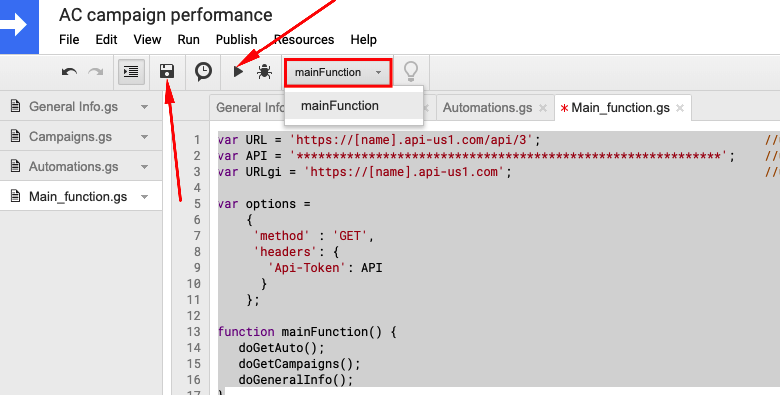
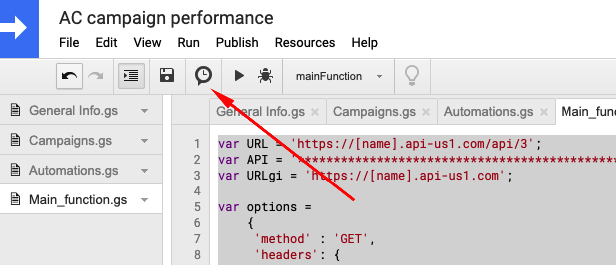
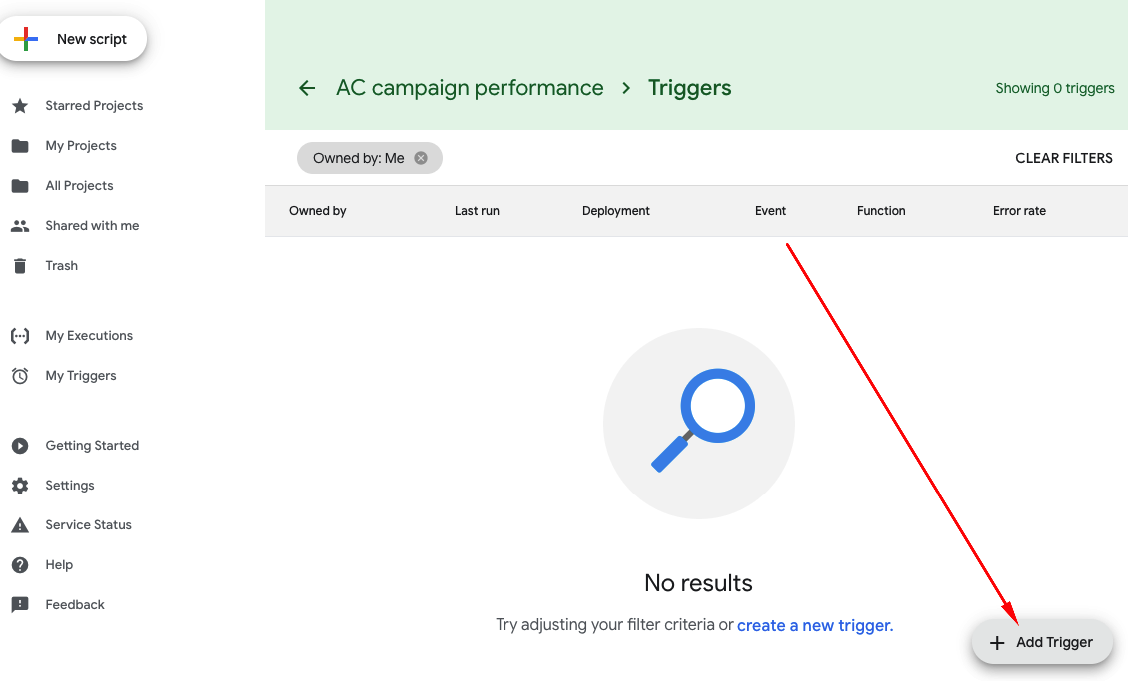
8. Now you need to launch automatic Triggers so this script can run updates automatically without the need to open that document and press a button. In order to action this press the icon “Current project’s triggers”. And add new trigger
Choose the following options:
Then choose the following options:
Choose which function to run → mainFunction
Choose which deployment should run → Head
Select event source –> Time-driven
Select type of time based trigger → Choose any frequency you prefer. We did select ‘Day timer’
Select time of day → choose any convenient for you time
9. Click ‘Save’ and check the results.
Advanced tips
- If you need more custom data you can alter the amount of fields you pull from ActiveCampaign. All methods and data are described in the AC API overview
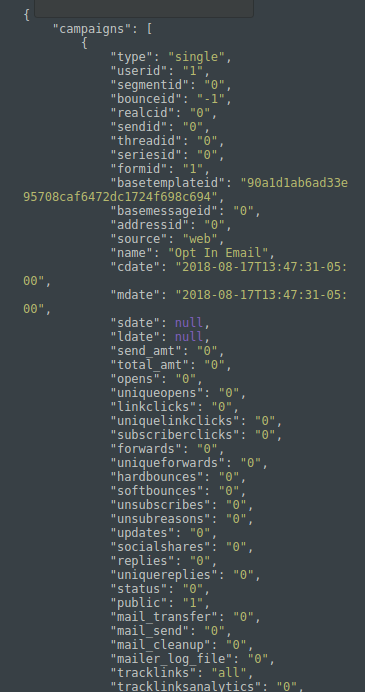
For example, you need to see data about all Campaigns you have created
– find “List all campaigns” in the AC API

– see which data you can get
b) Endpoints that return collections of resources must limit the number of records returned in a given response. The query parameter limit can be used to alter the number of records returned. A typical endpoint will return 20 records by default and will allow a maximum of 100 records to be returned.
var response = UrlFetchApp.fetch(URL+’/campaigns?limit=100′, options);
c) The orders parameter is available to apply multiple sorting criteria to a request. The parameter is set as an array where the key is the field to be sorted by and the value is the direction of sort, either ASC or DESC. Not all fields are available for ordering.
var response = UrlFetchApp.fetch(URL+’/campaigns?orders[id]=DESC&limit=100′, options);
Looking for a partner who can take the lead on the technical side of your projects? Get in touch!


Related Posts

The story of Templify app – our new product launch
Well, hello! It’s been a while since I wrote, but it’s about time I get back into it. I wanted…
Making reliable healthcare software tools
Digitalisation in healthcare services While other industries can afford to measure the success of their software in relation to sales…

Why your web or mobile app needs a regular security audit
Despite the obvious risks to a technology based business posed by hackers, phishers and other bad actors, sometimes a project’s…